
Ramin Nabati
Monday, June 22, 2020
Adv. PyTorch: Configuring MS Visual Studio for Using PyToch C++ API in Windows
This tutorial will walk you through the required steps to configure and use the PyTorch C++ API (LibTorch) in Microsoft Visual Studio. Although the recommended build system for LibTorch is CMake, you might find yourself in situations where you need to integrate your code into an existing Visual Studio Project/Solution and don’t want to deal with CMake files in Windows. Following the steps in this tutorial should get you up and running with LibTorch in Visual Studio without needing to use CMake to build it. These steps have been tested on Visual Studio 2019 and the CPU version of LibTorch 1.5.1. Let’s get started!
Step 1: Download LibTorch
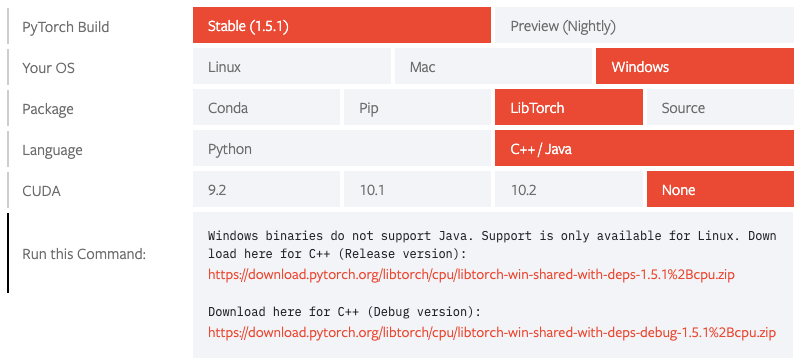
Download and extract the CPU version of LibTorch for Windows from here. Note that the Release and Debug versions have different download links, so get the one you need depending on your target configuration. We work with the Debug version here.
Step 2: Set Windows Environment Variables
We’re going to create some environment variables to make things easier. Use the following commands in a Windows Terminal to create an environment variable for the LibTorch directory:
setx LIBTORCH_DEBUG_HOME "C:\libtorch-debug-v1.5.1"
set LIBTORCH_DEBUG_HOME "C:\libtorch-debug-v1.5.1"
where
"C:\libtorch-debug-v1.5.1"is the path to the extracted LibTorch directory on your computer. Note that thesetxcommand creates the variable globally for Windows, and thesetcommand creates it just for the current session.If you want to build PyTorch C++ extensions, you’ll need to add the Python header files to your Visual Studio project. Use the following commands to create environment variables for your Python path. Note that if Python was installed as part of the Visual Studio, the Python directory should be in
"C:\Program Files (x86)\Microsoft Visual Studio\Shared". Otherwise locate your Python installation directory and change the path accordingly.setx PYTHON_HOME "C:\Program Files (x86)\Microsoft Visual Studio\Shared\Python37_64" set PYTHON_HOME "C:\Program Files (x86)\Microsoft Visual Studio\Shared\Python37_64"
Step 3: Configure Your Visual Studio Project
Open Visual Studio, create a project and make sure the Platform is set to x64. Following this tutorial, let’s create a simple C++ file called
dcgan.cppwith the following contents to test our setup later.#include <torch\torch.h> #include <iostream> int main(){ torch::Tensor tensor = torch::eye(3); std::cout << tensor << std::endl; return 0; }In Project Properties under
C/C++ -> General -> Additional Include Directoriesadd the path to LibTorch and Python include folders:$(LIBTORCH_DEBUG_HOME)\include $(PYTHON_HOME)\include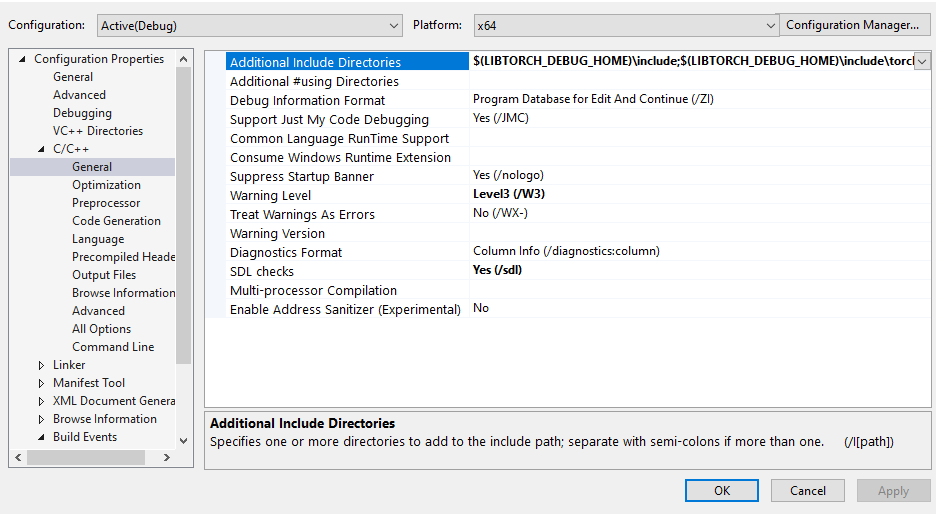
In Project Properties under
Linker -> General -> Additional Library Directoriesadd the path to LibTorch and Python lib folders:$(LIBTORCH_DEBUG_HOME)\lib $(PYTHON_HOME)\lib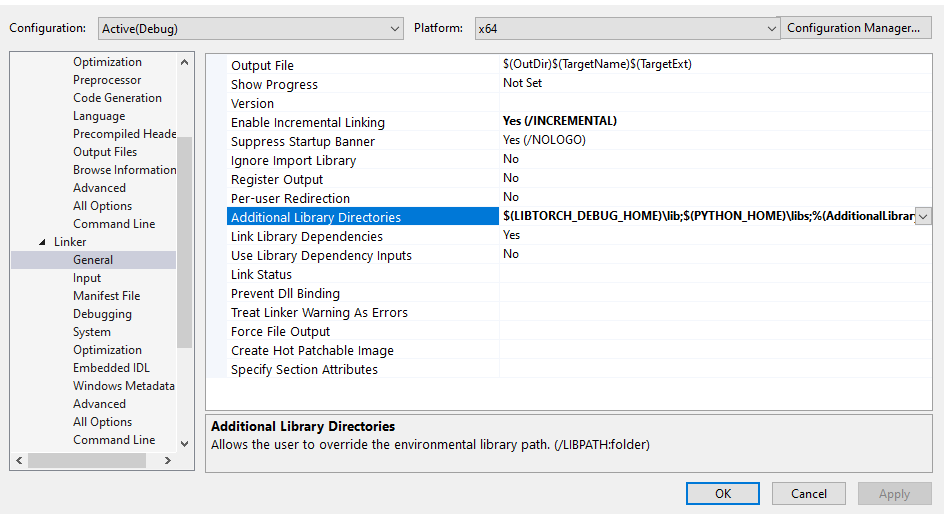
In Project Properties under
Linker -> Input -> Additional Dependenciesadd the following libraries:torch.lib torch_cpu.lib c10.lib python37.lib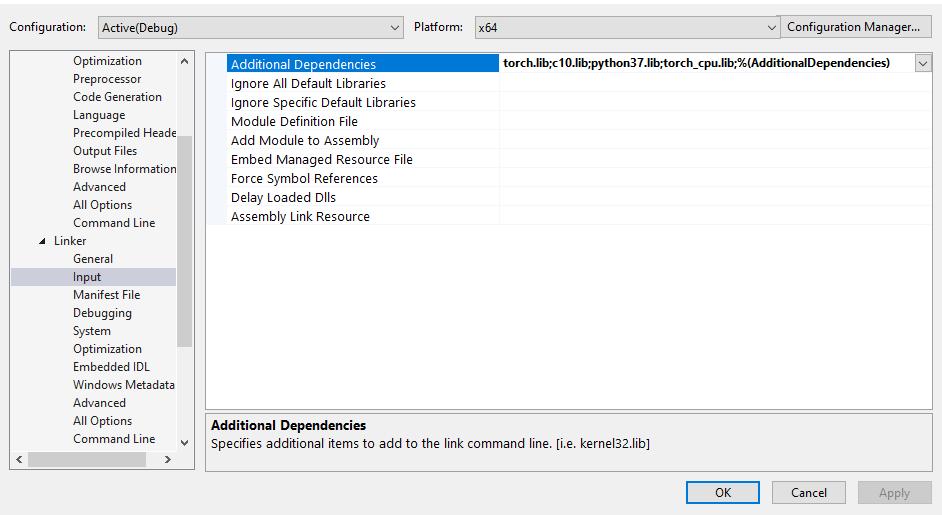
We also need to add a Post-Build Event to copy all the LibTorch
dllfiles to the target directory after every build. Without these files you’ll be getting a runtime error when executing your program. In Project Properties underBuild Events -> Post-Build Event -> Command Lineadd the following command:copy /y $(LIBTORCH_DEBUG_HOME)\lib\*.dll $(TargetDir)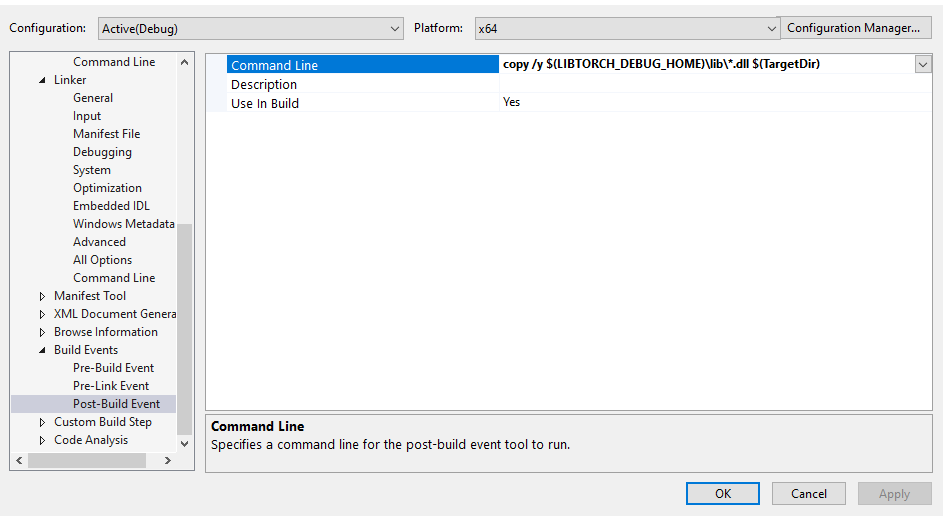
Step 4: Build and Run the Code
Now you can go ahead and build the project. Make sure you choose the same build configuration (Debug/Release) as the downloaded LibTorch package. To test our setup, run the generated executable file. The output should be a 3x3 diagonal matrix:
 1  0  0
 0  1  0
 0  0  1
[ CPUFloatType{3,3} ]